Tag: Visual edit |
(→Bosses: Link) |
||
| Line 380: | Line 380: | ||
== Bosses == |
== Bosses == |
||
| − | === Boss: [[Mod-Sprouted Pixel Dungeon/ |
+ | === Boss: [[Mod-Sprouted Pixel Dungeon/Bosses#Goo|Goo]] === |
The large black Goo now spawns 4 Mini-goo when he sees you in his lair. He heals in water, and coats you with caustic ooze which must be washed off in water. |
The large black Goo now spawns 4 Mini-goo when he sees you in his lair. He heals in water, and coats you with caustic ooze which must be washed off in water. |
||
Revision as of 22:48, 21 November 2018
Overview
Sprouted PD Main menu (v 0.4.2)
Sprouted Pixel Dungeon (also known as Sprouted PD and Sprouted) is an inactive (possibly dead) fork of Shattered Pixel Dungeon, and was first created and released in 2015, by reddit user /u/dachhack.
The major focus of this modification is the farming and grinding system, using new methods to upgrade weapons and armor, for boosted stats and effects. Less about the race against diminishing resources, and more about pushing the limits of what you can do within the game, Sprouted encourages you to attempt the impossible.
Featuring greatly enlarged maps; challenging bosses and mini-bosses; new quests, enemies, items, AND secrets; the revamped Dew Vial; with pixel art by /u/PavelProvotorov - this is one more addition to the Pixel Dungeon collection you won't want to put down.
Notable Features & Massive Changes
Pets
Monster eggs can be found throughout the dungeon, and if you find one and take care of it, it might just hatch into a pet! Your pet will follow you and help you fight your way through the dungeon. You can feed it, and play with it, and talk to it - actually, you can only feed it. But, if it dies, there are surely more eggs to be found..
Upgrade Your Way
In Sprouted, there are multiple ways to upgrade your gear:
- Dew Blessing - Upgrade weapons and armor up to +13/+14 via dew farming using two special techniques of the Dew Vial
- Reforging and Disenchanting - Transfer up to +13 from the Warrior's Short Sword or Mage's Wand of Magic Missile, and apply those points to different weapons
- Upgrade Goo - The new Upgrade Eater plant allows you to convert spare items into Upgrade Goo that you can use to upgrade your gear
- Scrolls - You can get many extra scrolls of Upgrade and Magical Infusion, by finding them scattered throughout the dungeon, or defeating Wraiths
These new and expanded methods allow you to take your gear to extreme levels, and the game is balanced with the assumption that you will do just that; however, you are slightly restrained by the upgrade cap that is set in place for items that are not reinforced.
Upgrade Cap
Weapons and armor in Sprouted cannot be upgraded past +15 with coventional means (specifically Scrolls of Upgrade and Upgrade Goo), unless they are first reinforced with different pieces of Adamantite, all of which can be found in various yet specific places throughout the dungeon, and are an in-game essential.
See the Adamantite and Reforging section for more details!
Once you get past the upgrade cap, the possibilties are endless - and there must be some reason to get gear higher than +15..
Items
The Dew Vial
- Main article: Dew Vial
The Dew Vial is the key to a successful Sprouted run. With multiple uses, and the option for players to choose from one of two distinct methods of filling and utilizing the tool, this revamped item is one that no adventurer should pass up.
See main article for full details.
Miscellaneous
- Main article: Sprouted PD Items
Sprouted Pixel dungeon features several unique items, as well as new uses or features for existing ones.
- Ankh
- Dark Gold Ore
- Mr. Destructo
- The Orb of Zot
- Toadstool Mushroom
- Honey
- Dwarf Demon Hammer
- Containers
- Otiluke's journal
Artifacts
- Main article: Sprouted PD Artifacts
Most Artifacts in Sprouted are identical to their counterparts in Shattered PD, with a few exceptions, noted on the Sprouted Artifacts main page.
- Ring of Disintegration
- Sandals of Nature
- Alchemist's Toolkit
- Cape of Thorns
- Cloak of Shadows
- Chalice of Blood
- Dried Rose
- Horn of Plenty
- Master Thieves' Armband
- Talisman of Foresight
- Timekeeper's Hourglass
- Unstable Spellbook
- Ring of Frost
Armor
All classes start with Cloth Armor. Each class of armor has better initial stats and stat gain per level, with Plate armor having the highest stats of them all. After slaying the Floor 20 boss, you will get an "Epic Armor Kit" that will reset the upgrade level of your armor but keep the stats, stat gain per level and your current enchantment if you have one. It will also give every class a special ability that takes some hp to use. It is recommended to max dew blessing your main armor before applying the kit.
Weapons
Missile
Melee
- Main article: Sprouted Pixel Dungeon/Melee Weapons
Apart from the fact that weapons do not degrade in Sprouted, they are mostly identical to the ones in Classic PD. They can, of course, be upgraded to much higher levels than is possible in Classic.
Sprouted features multiple new melee weapons, including new Tier-6 weapons that deal up to 4x damage against enemies found in Dolyhaven Mines.
- Spork
- Chainsaw Hand
- Royal Spork (Removed Currently)
- Ares Sword
- Crom Cruach Axe
- Loki's Flail
- Neptunus Trident
Reforging the Short Sword
You can transfer all upgrades from a Warrior's Short Sword to another weapon. The more Dark Gold Ore you have when you do this, the more likely upgrades past +1 will be transferred. Reforging the Short Sword does not consume the ore, so you can use it for other purposes afterwards.
Note that you will be unable to raise a weapon above +15 by reforging the Short Sword unless it has first been reinforced with the Adamantite Weapon.
It is also highly recommended that you save your maxed shortsword for the Teir 6 Dolyhaven weapons, as you will need much higher level weapons (100+) to defeat Zot in floor 99.
Wands
Most of the Wands in Sprouted PD are unchanged from the original versions in Classic PD, except that charges cap at 14 rather than 9, and it is impossible to target yourself by shooting at a wall.
Changed Wands
- Main article: Sprouted PD Wands
Unchanged Wands
- Main article: Classic PD Wands
- Wand of Amok
- Wand of Avalanche
- Wand of Lightning
- Wand of Disintegration
- Wand of Regrowth
- Wand of Blink
- Wand of Slowness
- Wand of Poison
- Wand of Flock
Disenchanting the Mage's Wand
You can transfer all upgrades from a Mage's Wand of Magic Missile to another wand.
The more dark gold ore you have when you do this, the more likely upgrades past +1 will be transferred. Disenchanting the MM wand does not consume the ore, so you can use it for other purposes afterwards.
Note that you will not be able to upgrade any wand above +15 by disenchanting, unless you first reinforce it with the Adamantite Wand.
Potions
- Main article: Sprouted PD Potions
Potions are based on v0.2.4 of Shattered PD, and thus are very slightly different than the ones in Classic PD. In addition, there are two new potions available in Sprouted: Mending and Life.
- Healing
- Mending
- Life
- Experience
- Strength
- Might
- Liquid Flame
- Frost
- Invisibility
- Levitation
- Mind Vison
- Toxic Gas
- Paralytic Gas
- Purification
Scrolls
- Main article: Sprouted PD Scrolls
Sprouted PD scrolls are basically similar to the ones in Shattered or Classic PD, with a few exceptions and tweaks.
- Regrowth
- Upgrade
- Magical Infusion
- Remove Curse
- Identify
- Terror
- Magic Mapping
- Recharging
- Rage
- Teleportation
- Psionic Blast
- Lullaby
- Mirror Image
Food and Hunger
- Main article: Sprouted PD Food
Food is relatively plentiful in Sprouted PD, which is helpful for exploring the larger levels, and for grinding. You should never be at serious risk of starving to death.
Hunger
The basic Hunger mechanic is most similar to that in Classic PD, however it takes approximately twice as long to reach the point of starvation in Sprouted. When fully sated, the hunger counter is at zero. When the hunger counter reaches 600, the Hero enters the Hungry state. When it reaches 700, S/he enters the Starving state, and will periodically lose a point of Health.
Food
Eating food lowers the hunger counter by some set amount. Some foods are more satisfying than others. Click the link above for detailed information on each type.
Dungeon Produce
- Main article: Sprouted PD Produce
Sprouted Pixel Dungeon comes with an astonishing variety of plants, seeds, nuts, and berries. They can be put to multiple uses, from simple nourishment to powerful alchemy.
Plants and Seeds
These are fairly similar to the seeds and plants in Shattered PD, but there are some differences.
Nuts and Berries
Nuts and Berries are unique additions to Sprouted PD. They have all manner of uses. There is also a Golden Dungeon Nut that raises strength and max health by either 2/20 or 5/50 respectively when eaten. You will be granted a Golden Dungeon Nut if you have slain 100 enemies on each of the Key floors.
Mushrooms
Another unique feature of Sprouted, mushrooms can have some interesting effects. It's fun to come up with creative ways of using them.
Pets
Pets hatch from Eggs, which are occasionally dropped by enemies or spawned in place of potions. To hatch an Egg, place it in your pack. Simply leaving it there long enough will eventually result in either a Spider or a Scorpion. If you want something more powerful, you can affect what will hatch by treating the egg in various ways.
In order of priority:
- Shadow Dragon - Obtain "Dragon Cave" Sokoban page
- Sugarplum Fairy - throw it on 10 summon traps
- Blue Dragon - freeze it 5 times, either with Potions of Frost or Icecap plants
- Violet Dragon - throw it on 5 poison traps
- Green Dragon - throw it on 5 lightning traps
- Red Dragon - burn it 30 times (throwing it on 15 fire traps would have that effect)
- Velocirooster - burn it once
- Scorpion - keep it in your pack for at least 4000 moves
- Spider - keep it in your pack for at least 2000 moves
To find out if there is anything alive inside the Egg, shake it. If you get a message saying "Just some sloshing around," it's not ready yet. Any other message indicates that something is ready to hatch. If it's what you want, you can then break the Egg, and your pet will be born. You can only have one pet at a time.
What happens when you shake them:
- Spider - "Something squirms inside!"
- Velocirooster - "Something scratches back!"
- Dragon (any) - "Something powerful kicks back!"
It is also possible to obtain a Steel Bee as a pet by dropping a Honeypot into a Well of Transmutation or Phase Pitcher, which results in a Steel Honeypot containing a Steel Bee. Shattering a Steel Honeypot while already having a pet does nothing to the Steel Honeypot.
When you have a pet, a "Pet" tab will appear in your Hero/ine's stat screen. This will show you your pet's current stats, including its level, health, and special attack status. It will also give you the option to feed your pet. Each pet has its own preferred type of food. Feeding it heals it to full and also eliminates the cooldown period for its special attack.
Food preference:
Special Attacks:
- Spider - Spins Web (Similar to Cave Spinners)
- Scorpion - <Please add>
- Velocirooster - <Please add>
- Dragons - Breath Weapon: (Ranged attack)
- Red Dragon - Fire (Applies burning debuff) - Thick Vegetation Precaution!
- Green Dragon - Lightning
- Violet Dragon - Poison (Applies poison debuff)
- Blue Dragon - Ice (Applies freezing debuff)
- Shadow Dragon - Shadow bolt
- Sugarplum Fairy - Heals
Special Attacks have a cool-down timer, and you will be notified whenever it is ready. Their cool down times will be permanently reduced when leveling up. If you're not patient enough, simply feed them, and their cool-down timer will instantly be reduced to 1. (It's not necessary to feed high level pets for that reason, since they have very short cool down times.)
You will be notified whenever their special attacks are ready and whenever they attacked with it. You will be notified either by narration (Your Violet Dragon is dripping poison!) or their own voice ("Rooaarr!!!") - <These examples are no longer available and is now replaced by references>
Other useful commands available in your pet's stats screen are "Stay/Release" and "Call." Since your pet's normal state is "Hunting," it will sometimes wander off in pursuit of its prey. These commands can help you keep it under control. If your pet is blocking your path, simply tap on it to switch places.
A pet's level is capped at 20. A pet this powerful will be pretty scary for enemies - most of the times a lot scarier than you. For this reason, you should consider keeping them by your side if your pet reaches high levels (if you love them).
A pet will follow you from one depth to another but only if it is right next to you when you ascend or descend. A pet will not jump down a chasm with you (Book of Heavens alert), nor will it teleport with you. If you leave a pet somewhere, you will not be able to hatch another while it is still alive.
WARNING - A pet will also follow you to key levels, but only if they are standing next to you. Keep in mind that this also applies when you leave. When you leave them there, you won't be able to retrieve them by any means, and this means you won't be able to have any other pet for the rest of that game (until you start a new game, of course). If you lost your Pet this way, solve Sokoban 4. There you get the Pet Whistle. Blowing into the Pet Whistle will instantly teleporting your Pet from anywhere to you. This can cause glitches, where you had more than one Pet on different Depths.
Enemies
In Sprouted, there is not a level cap, and enemies never stop giving XP; and they will continue to drop loot until your Hero/ine reaches very high levels.
The strength of most enemies on regular depths is adjusted upward according to the depth. Thus you will find that unlike in other versions of PD, a depth 4 Marsupial Rat is more daunting than a depth 1 Marsupial Rat.
Standard Enemies
- Main article: Sprouted PD Enemies
Some appear in more than one section of the dungeon; they will be listed where they are first commonly encountered.
Sewer
Prison
- Skeleton
- Fossil Skeleton
- Crazy Thief
- Swarm of Flies
- Gnoll Shaman
- Shinobi
- Special Prison Enemies
- Tengu
Caves
Dwarven City
Demon Halls
- Succubus
- Evil Eye
- Scorpio
- Demon Goo
- Special Demon Hall Enemies
- Burning Fist
- Rotting Fist
- Infecting Fist
- Pinning Fist
- Larva
Other Standard Enemies
Book Floor Enemies
Shadow Yog Enemies
Otiluke's Journal Enemies
Bosses
Boss: Goo
The large black Goo now spawns 4 Mini-goo when he sees you in his lair. He heals in water, and coats you with caustic ooze which must be washed off in water.
Mini-goo
These Mini-goo spawn in the cells adjacent to the Goo. Mini-goo also split when hit with physical attacks, but they cannot do this if the Goo has been defeated. Mini-goo will try to poison you and then flee, leaving a trail of webbing that will root you in place if you try to follow. Mini-goo also heal in water. The first four Mini-goo that spawn drop Potions of Mending when they are defeated.
A detailed boss guide can be found here.
Reward
Upon defeat, the last goo will drop the key to the floor, some gold, the first Otiluke's journal page and possibly a Mr. Destructo. In v0.3.0, if you don't get a Mr. Destructo, you will get a Bloodlust Chainsaw.
Boss: The Tengu
The Tengu uses ranged attacks that, in addition to direct damage, have a chance of setting you on fire, slowing, and paralyzing you. You encounter him in a room full of poison traps that start out inactive. If you get into melee range, you may get a few hits in before he teleports to another part of the room. Every time he teleports, some of the traps activate, making it more difficult for you to pursue him.
After you defeat him the first time, he will drop the floor key, and the door to the room will unlock as if the fight is over, but he will reappear instantly in the same spot. If you can manage to defeat him a second time before he can teleport 5 times, he will flee to his Hideout, leaving the key behind. He may teleport to any point on the floor, even outside the room, so you may need to search for him.
A detailed boss guide can be found here.
Reward
After his first defeat, the Tengu drops the floor key and some gold. If it is your first time beating him with your current character class, he will also drop the Tome of Mastery. Defeating him for the second time as described above gets you the Hideout Key, which you can use to follow him later, and obtain an Adamantite Ring.
Boss: The DM-300
The DM-300 has a ranged lightning attack, and a fairly weak physical attack. It is surrounded by a cloud of toxic gas that also has a chance of paralyzing you. When standing on one of the inactive traps found on this floor, the DM-300 will repair itself.
Robot Printers
There are two Robot Printers. They are stationary and do not attack, but rather will periodically spawn up to four Broken Robots at a time, in the spaces adjacent to them. Spaces occupied by a wall or creature (such as the hero or a bee) will not spawn a robot. When attacked, Robot Printers sound an alarm, alerting all mobs on the level to your location. When destroyed, they drop Red Dew.
Broken Robots
Broken Robots attack with disintegration rays that ignore your armor. They will attack indiscriminately, often damaging each other in the process, but as with a Wand of Disintegration, the damage of the beam is increased when multiple target are struck, so this actually makes them more dangerous. It is wise to avoid being attacked by them en masse. A Broken Robot may drop Red Dew or a Scroll of Recharging. It is recommended (if you are strong enough) to farm these while the Robot Printer is still active.
A detailed boss guide can be found here.
Reward
Upon defeat, the DM-300 drops the level key, and some gold. It has a small chance of dropping the Cape of Thorns.
Boss: The Dwarf King
The Dwarf King himself is not very dangerous, but if allowed he will go back and forth between his pedestals, summoning Undead Dwarves. It is best to defeat him before he does this. When he dies, a tombstone and 4 Dwarf Liches will appear at the north end of the chamber.
Undead Dwarves
Only dangerous in large numbers, their attack has a chance to paralyze you.
Dwarf Liches
Their ranged attack is similar to the Wand of Avalanche effect, doing physical damage with a chance of paralysis. You can defeat them, but while the tombstone is intact, they will continue to respawn. Destroying the tombstone will destroy them and end the fight. Dwarf Liches may drop berries or Potions of Healing. It is recomended to use the pickaxe on the Tombstone.
A detailed boss guide can be found here.
Reward
Destroying the tombstone will yield the floor key, some gold, and the Armor Kit.
Boss: Yog-Dzewa
The ancient god himself does not attack you, but whenever he is hit for physical damage, a larva spawns beside him. These can be dangerous in large numbers. In addition, any damage you do to Yog-Dzewa is dramatically reduced for every one of his Fists that is still alive. When Yog-Dzewa's health reaches a critical point, if you do not manage to defeat him quickly enough, he will teleport away from you, spawning 2-4 Evil Eyes, and respawning all of the Fists if they are dead at that point.
| Yog-Dzewa is an Old God, a powerful entity from the realms of chaos. A century ago, the ancient dwarves barely won the war against its army of demons, but were unable to kill the god itself. Instead, they then imprisoned it in the halls below their city, believing it to be too weak to rise ever again.
|
||
The Fists
It is generally advisable to destroy the Fists first.
| Rotting Fist | ||
| Melee. On hit, has a chance to cover you with Caustic Ooze. Regenerates health in water.
|
||
| Burning Fist | ||
| Ranged, uses Shadow Missile attack at any range, with a chance to weaken you. Surrounded by fire aura, which of course can burn you, as well as its allies.
|
||
| Melee. Will attempt to poison you and then flee.
|
||
| Ranged. Its attack has a chance of rooting you in place. If successful, it may flee.
|
||
A detailed boss guide can be found here.
Reward
Upon defeat, Yog-Dzewa drops some gold, and the floor key, which leads you down to the Amulet of Yendor. If you choose to continue playing after that, come back up, and use the End boss key again to return to the dungeon.
Boss: Shadow Yog
The entire level is riddled with hidden Summoning Traps, so you will want to use a Magic Mapping scroll, or a blueberry.
Upon arrival, even before leaving the vestibule, you will be attacked by Spectral Rats and Grey Onis. It is best to let them come to you until they thin out. Spectral Rats have a nasty Shadow Missile attack, but are weak in melee.
There are ten Shadow Yogs, but they do not spawn until you step out of the vestibule. You must be walking to trigger the spawn; if you are levitating it won't work, so don't splash yourself until after they appear.
Shadow Yogs usually sleep until disturbed. They do have a melee attack, but it is weak. When you get one down to about 1/8 of its total Health, it may teleport away, spawning more Rats and Onis around it. It is best to track it and finish it off before moving on to another target.
When the last Shadow Yog dies, all of the remaining Rats and Onis will die as well.
| Yog has retreated to his den in Shadow form. The legion of Yog is being fed strength from the mobs in the den.
|
||
| This shadowy rat is phasing in and out of this plane. It's eyes burn with an uncanny hatred.
|
||
| Oni are wicked trolls who dwell in places of great power. The grey variety are vicious but no less hungry...
|
||
Reward
Upon defeat, the last Shadow Yog drops the Orb of Zot. You may need to search around for it, as Shadow Yogs sometimes teleport right before they die.
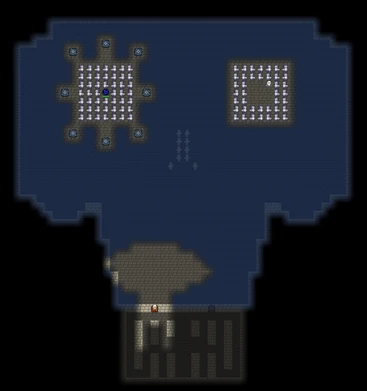
Boss: Stone Golem Otiluke

Map Overlay of Depth 62
This entire level is ridden with dangerous protectors and the all powerful Otiluke, transformed to a statue like form.
Uppon entering the boss room, you have no immediate threat. To the left is a ring of VERY POWERFUL lightning towers (They are Invulnerable and one shot you), with a 5x5 array of protectors surrounding the item to get to Zot, the Palantir. To the right is a similar array, with no lightning towers and Stone Otiluke instead of the Palantir.
The fight doesn't begin until you hit a protector, all of which have +10 enchanted weapons. Upon defeating Stone Otiluke the lightning towers will be deactivated and you can collect the Palantir and fight Zot. Beware: the protectors can teleport near to you. There are 80 protectors on the map, and all of them want you gone. If you obtained the Spectacles, then you can use mind vision and if you with huntress you can use spectral blades. Every other character could use mushrooms to hit all enemys at a time. If your armor is enchantet on metabolism, than you could wait, that the protectors teleport near to you to hit you, so you regenerate and then you can use more mushrooms (or Specral blades)
| powerful magic has turned Otiluke into a guardian of this level
|
||
| The lightning shell crackles with electric power. It's powerful lightning attack is drawn to all living things in the lair.
|
||
| You would think that it's just another one of this dungeon's ugly statues, but its red glowing eyes give it away.
While the statue itself is made of stone, the (Weapon Name) it's wielding, looks real. |
||
Strategy:
- Have a max blessed ring of haste and armor of viscosity or metabolism. (Other items work but not as good as the mentioned ones.)
- Go invisible.
- Go to the right bunch of monsters and hack away for 5 turns.
- GET NEAR OTILUKE! All you need is to defeat him, his troops are useless.
- Stay healthy with dew, sungrass, vamp weapon.
- Defeat Otiluke, go invisible, get the orb and get of.
Reward
Uppon defeat, you may collect the Palantir and as many weapons as you can carry. You may return using the Dolyahaven beacon to collect more.
Boss: Zot
This level contains Zot and Zot Phases. (Their character descriptions is exactly the same.) Your goal is to defeat Zot himself, for the final time. Damage done by T-5 and below weapons, Zeus' thunderbolt, and Spectral Blades are quartered. Zot spawns enchanted evil eyes and Zot Phases when attacked.
| Zot.
|
||
| Zot.
|
||
| One of this demon's other names is Orb of Hatred, because when it sees an enemy, it uses its deathgaze recklessly, often ignoring its allies and wounding them.
|
||
Strategy:
- Have Full dungeon Moon berry, 15 Moon berries, 5 Starflower Plants, and every other available seed and drug. Drink them all throughout the fight. ALL. Like you need it to defeat him. Also have Full Dew Vial plus 15 ankh that you get from the game.
- Have a T6 Dolyhaven weapon at least +100 (Dont use the violet upgrade goo on an other weapon. Only throw weapons in the upgrade eater who have a level higher than 10. Each violet upgrade goo acts like 5 scrolls of upgrade, but it cant burn) (If you dont you wont out-damage his health regen)
- Find him, he looks different from his clones with mind vision.
- Attack him and then keep teleporting to him as he tries to run.
- ATTACK ONLY HIM! His clones are useless.
- Wala, you defeated the boss. (I never did it so far, game keeps crashing at the Mines level.) (There is a glitch. You can only do this once. On every other run, the Dolyahaven Mines will not be generated)
Otiluke's Journal Enemies
Sokoban levels


Animated statues and Flying Protectors spawn in Sokoban levels although sometimes they can spawn in other floors. There are many fleecing traps, which will destroy your armor.
Dolyahaven
in the Dolyahaven level in floor 55 there are only one enemy ( BlueCat ) {please add info it's a thief type of enemy that only spawns once} There are also two shops and a few chests. The first shop sell 11 Scrolls of upgrade for 6000 Gold each. The second shop sell healing potions for 1800 Gold each. With a small chance, he sell seeds for 600 Gold instead of a potion. It also could happen, that he sell Mr. Destructo (for free) Each time you descend in the Dolyahaven Mines the shops will be refilled (Buy all scrolls of upgrade before descend into the Mines and when you are in the Mines than get enough stone ore (Sell value: 1000 Gold) to buy all scrolls of upgrade each time you descend to have enough scrolls of upgrade to defeat Zot)
In the SouthWest corner of the town there is an abandoned mine that is covered in bushes. You have to burn it to get into the mine. in the mine there can spawn a few enemy. Solve the Sokoban puzzle 2 to get the Spectacles. Equipping them allows you to use scroll of Magic Mapping.
Kupua
Kapuas have haste and they can move 2 tiles at 1 turns
When struck or defeated they have a chance to release a greenish toxic gas that can't be negated by drinking or throwing a potion of purification's. It inflicts dizziness, cripple, and a VERY VERY SEVERE bleeding (1 tick of the bleed can inflict around 10%-30% of your health) debuffs and drops stone ore each time defeated.
| Kupua are minor trickster demons who like to appear enmasse.
|
||
Gullin
Gullins only move 1 tile per turn.
They have a smaller chance to release the greenish toxic gas and they have a chance to drop a Norn Stone instead of Stone ore. When a Gullin spawns, he summon up to 4 Kupuas arournd him.
| Gullin | ||
| A golden-maned boar demon. Its eyes and bristles glow in the dark cave.
|
||
A strategy for melee characters to defeat them is:
Have a vampiric weapon, preferably spork. Hit a Kupa until you see the first green cloud form. Run backwards. They will not chase as they will also be confused be the gas cloud. In a few (5?) turns, the cloud will disappear. If caught in cloud or forced into multiple Kupa's, use Hourglass, Wand of Blink, Armor Special Skill, or hit away with your vampiric weapon to heal up the damage and then use your items to get out of cloud. After getting out, immediately use towel and WAIT for the dizziness debuff to stop, or else you risk walking into the cloud again. The best weapon you can have here is the Lucky Crom Cruach Axe. Its effect will protect you from all negative effects, if you dont already have them. When you have upgraded the Crom Cruach Axe to 100+ then you can activate the effect every fourth turn.
A strategy for ranged characters to defeat them is:
Don't bother with wands. Their armor is too high, they are too fast, and no one will have enough mind vision potions to see them from afar. The mine levels are also usually very tight spaced, to wands + mind potions will not do the trick as well as in the upper levels. Unless you are the king of RNG, and have a +100 fire wand, then you can fire the wand pray that your own wand wont execute you as well as the Kupua.
It is very recommended to use towels (The towel have a maximum of 10 uses) and a wand of blink (You need very much scrolls of Recharging) to negate the bleeding debuff and to teleport away from the gasses. A high level (30+) ring of Tenacity will reduce the damage you get from the bleeding debuff the lower your health is. A high level (30+) ring of elements will reduce the time you have the effect.
It is not recommended to bring pets; however, you can use towels on your pets. {please improve this article if you want more info on this floor contact me -Kreynon} {Did i give good tips? -Ak2741} {I hope you now know more about it -Powered_Blood}
Pets will get one shot on this level.
You can find a sugarplum fairy pet and tell it to stay in dolyahaven near the mine entrance, when your Health is low, you can use the beacon to get up and heal with the sugarplum fairy. My personal strategy is using wands. Use a as many firebolt wands you have, and upgrade it to +15, use ring of magic +15,ring of haste +15, and wand of blink+15. lure them into a room or a long corridor, hit them with firebolt wand. If they get close, use wand of blink out of the room or to a safe place. repeat process. Excessive use of wand with the ring of magic on can cause damage. I recomend this strategy for farming ores. -Kreynon.
Aftet defeating Shadow Yog, you can upgrade your gear with the dew vial to +16/17, with scrolls of upgrade, the maximum is still +15.
Mini-Bosses
Rat Boss
Spawns on Floor 1 only. Summons Marsupial Rats upon sighting you. Has the chance to drop Monster Meat, occasionally Dungeon Blackberries, and rarely a Scroll of Regrowth.
| Larger and stronger than other Marsupial Rats, the Rat Boss can summon a pack of Rats from the shadows of the Dungeon.
|
||
Tengu (Hideout Battle)
Accessible via the Hideout Key, which you can obtain on Floor 10 after defeating the Tengu for the second time, or in some circumstances on the Forest level.
This annoying battle mostly consists of chasing the Tengu around, while fighting off the Shinobi that spawn every time he teleports. A ranged attack or Haste is helpful here. When finally defeated, the Tengu drops one of the two Adamantite Rings, needed if you want to reinforce any rings for upgrading above +15.
The Rat King is also hiding somewhere on this floor, and he actually has some decent loot. You can often pick up one or two Mr. Destructos, and several of the rarer seeds.
Use the Key again to return to the dungeon.
| Tengu are members of the ancient assassins clan, which is also called Tengu. These assassins are noted for extensive use of shuriken and traps.
|
||
Skeleton King
Accessible via the Inscribed Bone, which is dropped by a Moss-Covered Skeleton on the Prison Battlefield level sometime after 50 Skeletons are defeated.
Burn the shrubbery to get access to the main chamber. The Skeleton King is accompanied by two skeletal hands, one of which likes to set you on fire. Slay the skeleton hands first, so you can slay the King himself. The King drops the Adamantite Weapon when he dies, an essential item for reinforcing your weapon.
Use the Bone again to return to the dungeon.
*There are some cases where you can't defeat it because of its life regeneration. Beware.
| This ancient giant skull belongs to the king of skeletons. | ||
| This ancient giant hand belongs to the king of skeletons.
|
||
Crab King
Accessible via the Conch Shell, which is dropped by an Albino Piranha on the Flooded Mine level sometime after 50 Piranha are defeated.
The Crab King's lair is one of the more dangerous places in the dungeon, because the power of the lightning attacks is amplified by the fact that you're standing in water. You should make sure you have at least one imbued ankh before going there. It is best to also have a Potion of Levitation.
Dachhack recommends using a Potion of Levitation to minimize the effects of the lightning attacks, then taking out the Lightning Shell, then the minions, then the King. While that can work, it's simpler to drink a Potion of Mind Vision and splash yourself from the Dew Vial before going in, toss a Potion of Paralytic gas at the minions, and then just defeat the King. If you have to go into the gas cloud to do it, obviously drink a Potion of Purification first. When the King dies, he drops the Adamantite Armor, and some cash. The minions also drop four Golden Keys that can open all Locked Chests or Crystal Chests in the dungeon.
Use the Shell again to return to the dungeon.
The Lightning Shell only drops a red Dewdrop (5 regular Dewdrops) and therefore should be ignored on the lvl. AgentE
| The crab king collects protective magical items to make himself stronger. He is hiding himself in a powerful suit of armor.
|
||
| The lightning shell crackles with electric power. It's powerful lightning attack is drawn to all living things in the lair.
|
||
| Minions of the crab king, these tough crabs absorb all but the weakest attacks with their shells. The damage they absorb is used to charge the lightning shell.
|
||
Thief King
Accessible via the Ancient Coin, which is dropped by a Crazy Gold Thief on the Vault level sometime after 50 Thieves are defeated.
By this time the Thief King and his buddies should not present any particular challenge. The fun thing about this level is that bits of the floor keep collapsing. The thieves levitate, so it doesn't hinder them. It's even possible for the King to die while hovering over a pit, which means that the Adamantite Ring he drops will fall into the floor below. You can retrieve it by jumping into the pit after it.
In fact... you can keep climbing up and jumping down as many times as you like. The floor below will regenerate each time, spawning minor loot like scrolls, potions, weapons, armor, even wands, rings and artifacts on occasion. If you are behind on your farming, this is a good place to catch up without being disturbed. The only mobs you will meet are the occasional mimic and, rarely, a red wraith from skeletal remains. Jumping hurts, of course, so keep an eye on your health. Watch out, in version 0.3 (and maybe later?), if you fall down from the floor below (two levels below the Thief King level), you'll be stuck on Level 42 and will not be able to go back to your game, ever; death by helplessness.
Use the Coin again to return to the dungeon.
| The king of all dungeon thieves.
|
||
| Deeper levels of the dungeon have always been a hiding place for all kinds of criminals. Not all of them could keep a clear mind during their extended periods so far from daylight. Long ago, these crazy thieves and bandits have forgotten who they are and why they steal.
|
||
Adamantite and Reforging
Overview
As of version 0.3.0, weapons, wands, rings, and armor have a "soft" upgrade cap of +15. Once an item reaches that level, you can no longer use Scrolls of Upgrade on it, or Upgrade Goo. Attempting to transfer upgrades via reforging or disenchanting will also only work up to the cap, unless the item has been 'reinforced' with Adamantite. Reinforced items can be upgraded by all normal means, without limit.
There are five pieces of Adamantite available in the game, which can only be obtained by completing certain floors and quests. Each piece will reinforce a specific type of item when you take it to the second Troll Blacksmith - but every troll has his price.
IMPORTANT: In order to beat the game you will almost certainly need your endgame weapon well above +15, unless you are relying on a wand for offense (in which case you would likely need that above +15). It is therefore nearly essential to get the Adamantite Weapon, and it is possible to miss getting it by leaving the Prison Battlefield level too early. The only alternative would be to use a weapon that comes already reinforced, meaning the Spork or the Chainsaw Hand.
Do not leave the Key Floors until you claim the Boss Portal drops. You need them to obtain the Adamantite gear. The special portal items drop randomly after a set amount of special enemies are defeated.
Note: The upgrade cap is "soft" because there are two ways around it: Scrolls of Magical Infusion continue to work on all weapons and armor, even if they are not reinforced; and Dew Blessing can actually raise all items to +16 or +17, but not until your Hero/ine reaches Depth 35.
Adamantite Weapon
On the Prison Battlefield floor, the game tracks how many Moss-Covered Skeletons have been slain. Somewhere between 51 and 101 Skeletons defeated, a random Skeleton will drop an Inscribed Bone - be sure to pick it up. After returning to the dungeon, reading the inscription on the Bone will teleport your Hero/ine to lair of the Skeleton King, who will drop the Adamantite Weapon upon defeat.
Adamantite Armor
On the Flooded Mine floor, the game tracks how many Albino Piranhas have been slain. Somewhere between 51 and 101 Piranha defeated, a random Piranha will drop a Conch Shell - be sure to pick it up. After returning to the dungeon, blowing through the Conch will teleport you to the lair of the Crab King, who will drop the Adamantite Armor upon defeat.
Adamantite Wand
Mages
The Old Wandmaker (always appearing on Depth 7) leaves the Adamantite Wand behind when he teleports away, after his quest is completed. For Mages, this happens automatically, with no extra requirements.
Non-Mages
Non-Mages can obtain the Adamantite Wand if they complete the Old Wandmaker's quest without defeating any enemies from the time they leave the Sewers. This means you will have to pass Depth 6 and at least part of Depth 7 - and complete the Old Wandmaker's quest - without defeating a single enemy. The game records total number of enemies defeated as you enter the Prison. If that number is unchanged when you receive a Wand from the Wandmaker, he also will drop the Adamantite Wand as an extra reward.
Adamantite Ring (1)
On the Golden Vault floor, the game tracks how many Crazy Gold Thieves have been slain. Somewhere between 51 and 101 Thieves defeated, a random Thief will drop an Ancient Coin - be sure to pick it up. After returning to the dungeon, reading the inscription on the Coin will teleport you to the lair of the Thief King, who will drop an Adamantite Ring upon defeat.
Adamantite Ring (2)
After you defeat the Tengu on Depth 10, he reappears and attempts to escape to his Hideout. If you can defeat him a second time before he jumps 5 times around the floor, he will drop the Hideout key. If you use the Key to follow him to his Hideout and defeat him a third and final time, he will drop an Adamantite Ring.
If you somehow fail to defeat the Tengu the second time before he escapes, it may still be possible to get the Hideout Key, but only in the unlikely event that you have not yet done the Forest Depth.
On the Forest Depth, the game tracks how many Gnoll Archers have been slain. If you have passed Depth 10 but not obtained the Hideout Key, then somewhere between 51 and 101 Gnoll defeated, a random Archer will drop it.
Reinforcing
To reinforce your items with the Adamantite Ore, you need to take them to the second Blacksmith, "Bip". Not to worry, he can be found in the same room as the first Blacksmith ("Bop"). If you have an Adamantite item and 50 dark gold, he will reinforce a corresponding item of your choosing.
Troll Blacksmith Reforging
As in Original and Shattered PD, you can take an item to the Troll Blacksmith, "Bop", (usually appearing on Floor 11 in Sprouted) to be reforged. What is different in Sprouted is that you can transfer up to 13 upgrades from one item to another, and the items don't have to match. You are guaranteed to get at least one upgrade transferred. After that, the chance for each level of upgrade being transferred increases according to how much dark gold ore you have at the time, and decreases with each level past +1, with a floor of 50% per point.
To ensure the maximum transfer of upgrades, it was recommended that you have 100 pieces of ore when reforging; however this consumes the ore, which you may prefer to use for reinforcing other items. Without using any ore, you are still likely to get most of the upgrades transferred. If you chose Water with Dew, you can make up the difference with upgrade goo. Those who chose Draw Out Dew would still probably be best advised to use up the 100 pieces on their weapon, as they are unlikely to find very many Upgrade Eater seeds.
Dark Gold Consumption
As of the current update (0.3.5c), Bop will take all the ore you have when reforging gear; however, Bip will only take 50 pieces when reinforcing with Adamantite. There is a finite amount of ore available, so be careful not to waste it. Choose carefully which items you want to reinforce.
Pit Rooms
Sectioned off pits that contain piles of bones and empty wells. A small sign has writing scrawled on the wood; maybe it points to the way out..
The only entrance to pit rooms is via the collapsed floor rooms from the Depth above. Falling in can be dangerous - so watch your step.
The pile of bones in the vault always contains a Scroll of Teleport, a Seed of Fadeleaf, and an Ankh. Other items like scrolls, potions, food, gold, and artifacts can be found in the piles.
A Red Wraith may spawn from the skeletal remains. If you don't have some kind of magical attack, it's wise to make sure that you have access to Invisibility in one form or another, to allow you to make a surprise attack. Failing that, standing on the remains before searching them will instantly destroy any Wraith that spawns - at the cost of half your health.
Key Floors
Also known as "Dew Levels", Key Floors allow those who chose "Draw Out Dew" to fill their Dew Vials very quickly, because mobs will drop multiple colorful dew drops on death. Standard mobs drop yellow and red drops, worth 2 and 5 dew, respectively; Flying Protectors drop violet drops, worth 50.
Mobs on Key Floors become stronger, the more of them you defeat, so lingering there can be dangerous. But it is worth staying long enough to defwat at least 100 on each one, as you will get rewards for doing so. In addition, on most of the Key Floors, a special item will drop sometime after 50 enemies are defeated, which will allow you to obtain the Adamantite that you need to reinforce your gear.
Note that on those Key Floors that have grass, the grass regenerates spontaneously, giving you an additional source of dew.
Ancient Forest
Accessible by using the Ancient Sewer key dropped by the Gnoll Archer on depth 4, this secret floor is home to Gnoll Archers and Flying Protectors. The goal is to slay 100 Gnoll Archers, and upon exit, you will be rewarded with 30 Forest Darts.
If you chose to Draw Out with your Dew Vial, Gnoll Archers will drop multiple yellow and red dew droplets upon defeat.
Gnoll Archers will attack you from afar with Forest Darts and flee from melee combat; they drop 3 Forest Darts upon defeat. The most effective way to slay them is with their own darts.
Flying Protectors shoot lightning but have a weak melee attack; they always drop violet dew droplets, which are worth 50 dew points.
In the unlikely event that you have not completed this depth before defeating Tengu, sometime after 50 Gnoll are defeated an Archer will drop the Tengu's Hideout Key. This will allow you to follow him to his hideout and obtain an Adamantite Ring.
Some time after 50 Gnoll are defeated, the Journal Page for the Safe Room will be dropped by a Gnoll Archer.
| This gnoll is camouflaged and hiding in the foliage. He's pretty upset you are here.
|
||
Prison Battlefield
Accessible by using the Ancient Prison key dropped by the Moss-Covered Skeleton on depth 9, this secret floor is home to Moss-Covered Skeletons and Flying Protectors. The goal is to slay 100 Skeletons, and upon exit, you will be rewarded with 20 Holy Hand Grenades.
IMPORTANT: Sometime after 50 Skeletons are defeated, a skeleton will drop the Inscribed Bone, which will take you to the lair of the Skeleton King, where you can obtain the Adamantite Weapon. You need this to complete the game. Do not exit the Prison Battlefield until you have the Inscribed Bone.
If you chose to Draw Out with your Dew Vial, Moss-Covered Skeletons will drop multiple yellow and red dew droplets upon defeat. Even if you chose Water With Dew, the Skeletons will still occasionally drop a red or yellow droplet.
100 Holy handgrenades can be found in a chest on the secret floor and frighten, damage, or destroy the Moss-Covered Skeletons.
Moss-Covered Skeletons attack with a strong melee strike, but the first 50 are slow-moving and easily kited. The more you slay, the faster and stronger they get, however. After 50, it is best (unless equipped with an upgraded Ring of Haste) to use a combination of grenades and ranged attacks to slay them as they approach you.
| Animated remains from an epic battle on this level. This skeleton rose from the ground covered in moss. It is angry you have disturbed this place.
|
||
Flooded Mine
After descending to depth 11, the Ancient Caves key to the mines can be found by slaying any Giant Piranha, anywhere in the dungeon - it doesn't have to be in the Caves. This secret floor is home to Albino Piranhas and Flying Protectors.
Inside the chest is a Potion of Levitation and 99 Dumpling Bombs. Use the bombs to teleport the sleeping Piranhas to dry land, where they will die. Once they are awake, they are difficult to target with the bombs, but there are other ways to slay them. See here for a tip on getting the Piranhas to respawn quickly.
The goal is to slay 100 Albino Piranhas, and upon exit, you will be rewarded with 10 of each common berry. In addition, if the depth is completed at night, you will receive the Full Moon Berry as a bonus.
Sometime after 50 Piranha are defeated, a Piranha will drop a Conch Shell, which can be used to access the lair of the Crab King. There you will be able to obtain the Adamantite Armor - assuming you survive.
Albino Piranhas have a strong bite and are very fast, but they are blind and only become alerted to the splashing of prey in the water. They cannot detect you when you are on land or levitating.
If you chose to Draw Out with your Dew Vial, Albino Piranhas will drop multiple yellow and red dew droplets upon defeat. They will occasionally drop mushrooms or monster meat.
Flying Protectors on this depth also do not notice you when you are on land but will attack you if they catch you in the water.
| Albino Giant Piranha | ||
| These huge blind cave fish inhabitant pools of underground water. Vibrations in the water alert them to prey. They look ferocious and hungry.
|
||
Golden Vault
Accessible by using the Ancient City key dropped by the Crazy Gold Thief on Floor 19, this final key floor is home to Crazy Gold Thieves.
Crazy Gold Thieves don't do much damage when they hit, but they do try to steal your gold and then flee with it. They drop their own gold upon defeat, as well as yours if they have stolen any.
The goal is to slay 100 Thieves, and upon exit, you will be granted a Golden Dungeon Nut, but only if you have already slain 100 enemies on each of the other Key floors.
The other main reward on this depth is the massive quantity of gold, much of it just lying on the ground, the rest dropped by the Thieves. By the time you have slain 100 Thieves, you should have more than enough gold for the rest of the game if you dont want to go to the dolyahaven mines.
Sometime after slaying 50, one of the Thieves will drop an Ancient Coin, which will give you access to the lair of the Thief King, where you can obtain the second Adamantite Ring.
If you chose to Draw Out with your Dew Vial, Crazy Gold Thieves will drop multiple yellow and red dew droplets upon defeat.
| This thief has gold dust covering his robes and skin. He has a crazy glint in his eye.
|
||
Book Floors
The books are too expensive to buy before defeating Yog-Dzewa, but afterwards the Imp offers them at a steep discount. The main goal of each floor is to obtain one of the SanChikarahs. When you have all three, you can take them to the Troll blacksmith to be reforged, allowing you access to the final boss fight.
Besides the main goal however, there are other things of interest to do or acquire on each floor. It is best to do the levels in the following order:
Book of the Dead

Book of the Dead
Discounted price: 7500
Enemies: Wraiths, Blue Wraiths, Dwarf Liches, occasionally Red Wraiths
Features: Graves. Lots and lots of graves. Also random loot.
The main benefit of this level is that disturbing graves will spawn wraiths, which have a base 15% chance of dropping scrolls of Upgrade or Magical Infusion on defeat. Having a Ring of Wealth (+13 or above is recommanded) equipped improves the chances dramatically. Be sure to leave enough room around you for all 4 wraiths to spawn, to maximize your chances.
Blue Wraiths are very fast, and drop red dew upon defeat.
When ready, take the SanChikarah of Death, stand on its pedestal, and read the Book again to return to the dungeon.
| Blue Wraith | ||
| A Blue Wraith has been dispatched to avenge the dungeon.
|
||
Book of the Living

Book of the Living
Discounted price: 12500
Enemies: Onis
Features: Garden rooms, lots of grass, honeypots, ankhs, grain of Magic Rice, random loot, a Toadstool, and the Tinkerer
Give the Toadstool to the Tinkerer to receive your final Dew Vial upgrade. After that, your vial will hold up to 300 drops, and splashing will also give you Levitation in addition to Haste and Invisibility.
Picking up the grain of Magic Rice will sound an alarm, but the Onis are alerted to your presence as soon as you arrive anyway, so it doesn't matter. The grain itself is not terribly useful at this point, but you may want it for the novelty factor.
Many of the garden rooms will contain ankhs, so this is your chance to stock up. If you have been unlucky enough not to find the chain before now, it should appear on this level. In addition, several of the garden rooms are likely to contain Blandfruit bushes, so you can gather some fruit while you are here. You may also want to stock up on honeypots.
The Onis are fairly tough, but your gear should be highly upgraded before you ever come here, so they should not be difficult to deal with. In fact, if you can find a 3x3 or 3x5 garden room, there's no reason not to farm dew in it to fill your vial.
When ready, take the SanChikarah of Life, stand on its pedestal, and read the book again to return to the dungeon.
| Oni are wicked trolls who dwell in places of great power. They are quite lazy unless there is food near by...
|
||
Book of the Heavens

Book of the Heavens
Discounted price: 15000
Enemies: Flying Protectors, Animated Statues
Features: Wells, Phase Pitcher seeds, random loot
It's best to splash yourself with dew as soon as you arrive. Assuming that you've got the final upgrade, this will let you navigate the level easily, while avoiding mobs until you choose to attack them. You will also find a Potion of Levitation nearby when you arrive.
There are several useful things you can do here. The level usually features a complete set of wells, including Transmutation, and you can almost always find several Phase pitcher seeds lying around. In addition, Animated Statues drop upgraded weapons (at least +3) upon defeat. Of course you already have your endgame weapon by this point, but you can collect these weapons to turn into upgrade goo, to upgrade your gear even more.
The most significant thing about this floor is that you can do it as many times as you like, as long as you don't pick up the SanChikarah of Transcendence. Simply wait until your Levitation wears off, and allow yourself to fall into the chasm. You will end up in a small room with a ladder. Climbing out, you will find yourself on depth 1. You can read the book again to repeat the level, which will be all new and restocked. The main benefit is getting enough PP seeds for your purposes, and enough identified weapons to turn into upgrade goo. You will also pick up minor loot, or major loot if you happen to be wearing a Ring of Wealth.
When ready, pick up the SanChikarah of Transcendence, stand on its pedestal, and read the book again to return to the dungeon.
It is recommended that you do not pick up the SanChikarah until you are ready to read the book and move on. If you fall into the chasm with it in your backpack, it should disappear and respawn on the pedestal when you return; however, according to some players' reports, this may occasionally trigger game-breaking bugs. Better safe than sorry!
| These sentinant statues guard this level from the unclean. That means you.
|
||
FAQ
How do I exit the book floors?

SanChikarah
Stand in the room where the pedestal you found the SanChikarah on is at and read the book again.
What do I do with the three SanChikarah?
Take them to the blacksmith, and he will reforge them into one glowing piece, which you can activate to get to Shadow Yog. You do not need any gold ore for this, but as of v0.3.0, you have to have first done the blacksmith's quest (defeat a bat or mine 15 pieces of ore) and collected your reward from him (getting an item reforged) before he will reforge the SanChikarah.
Tips and Tricks
XarxD's Non-Daily Tips of the Day
- Gone Fishing
- Dew, or Dew Not
- Grave Robbing for Fun and Profit
- Water Wisely
- Key Facts
- Key Facts, part 2
- The Best Defense...
- Just A Phase
- The Goo: A Boss Guide
- The Tengu and the DM-300: Boss Guides
- The Dwarf King: A Boss Guide
- Yog-Dzewa: A Boss Guide